> For the complete documentation index, see [llms.txt](https://docs.pockethrms.com/llms.txt). Markdown versions of documentation pages are available by appending `.md` to page URLs; this page is available as [Markdown](https://docs.pockethrms.com/feature-guides/smhrt-report-generation.md).
# SmHRt Report Generation
### **Configure Custom Fields**
Every report in Pocket HRMS comes with a fixed set of fields within a system. **Configure Custom Fields** is a framework that lets you change that Field layout yourself, for a single report — without changing what the report data actually calculates.
**Important Note:** **Configure Custom Fields** is being rolled out in phases. It is currently available in the Attendance module, for the reports listed below, and is being extended to other reports/modules.
**Before You Begin**
Make sure of the following:
* You are logged in to the Pocket HRMS Cloud Portal with access to the Reports section
* The report you want to configure shows a settings icon in its header
* The master fields you want to add are enabled in your company's Employee Profile Configurations.
### **How to Configure Custom Fields in a Report?**
**Path:** Cloud Portal > Reports > Select a Module > Click on the Settings Icon > Configure Custom Fields.
**Step 1:** Log in to the **Cloud Portal**, open **Reports**, select the **module** you need, and then select the **report** you want to configure before generating.
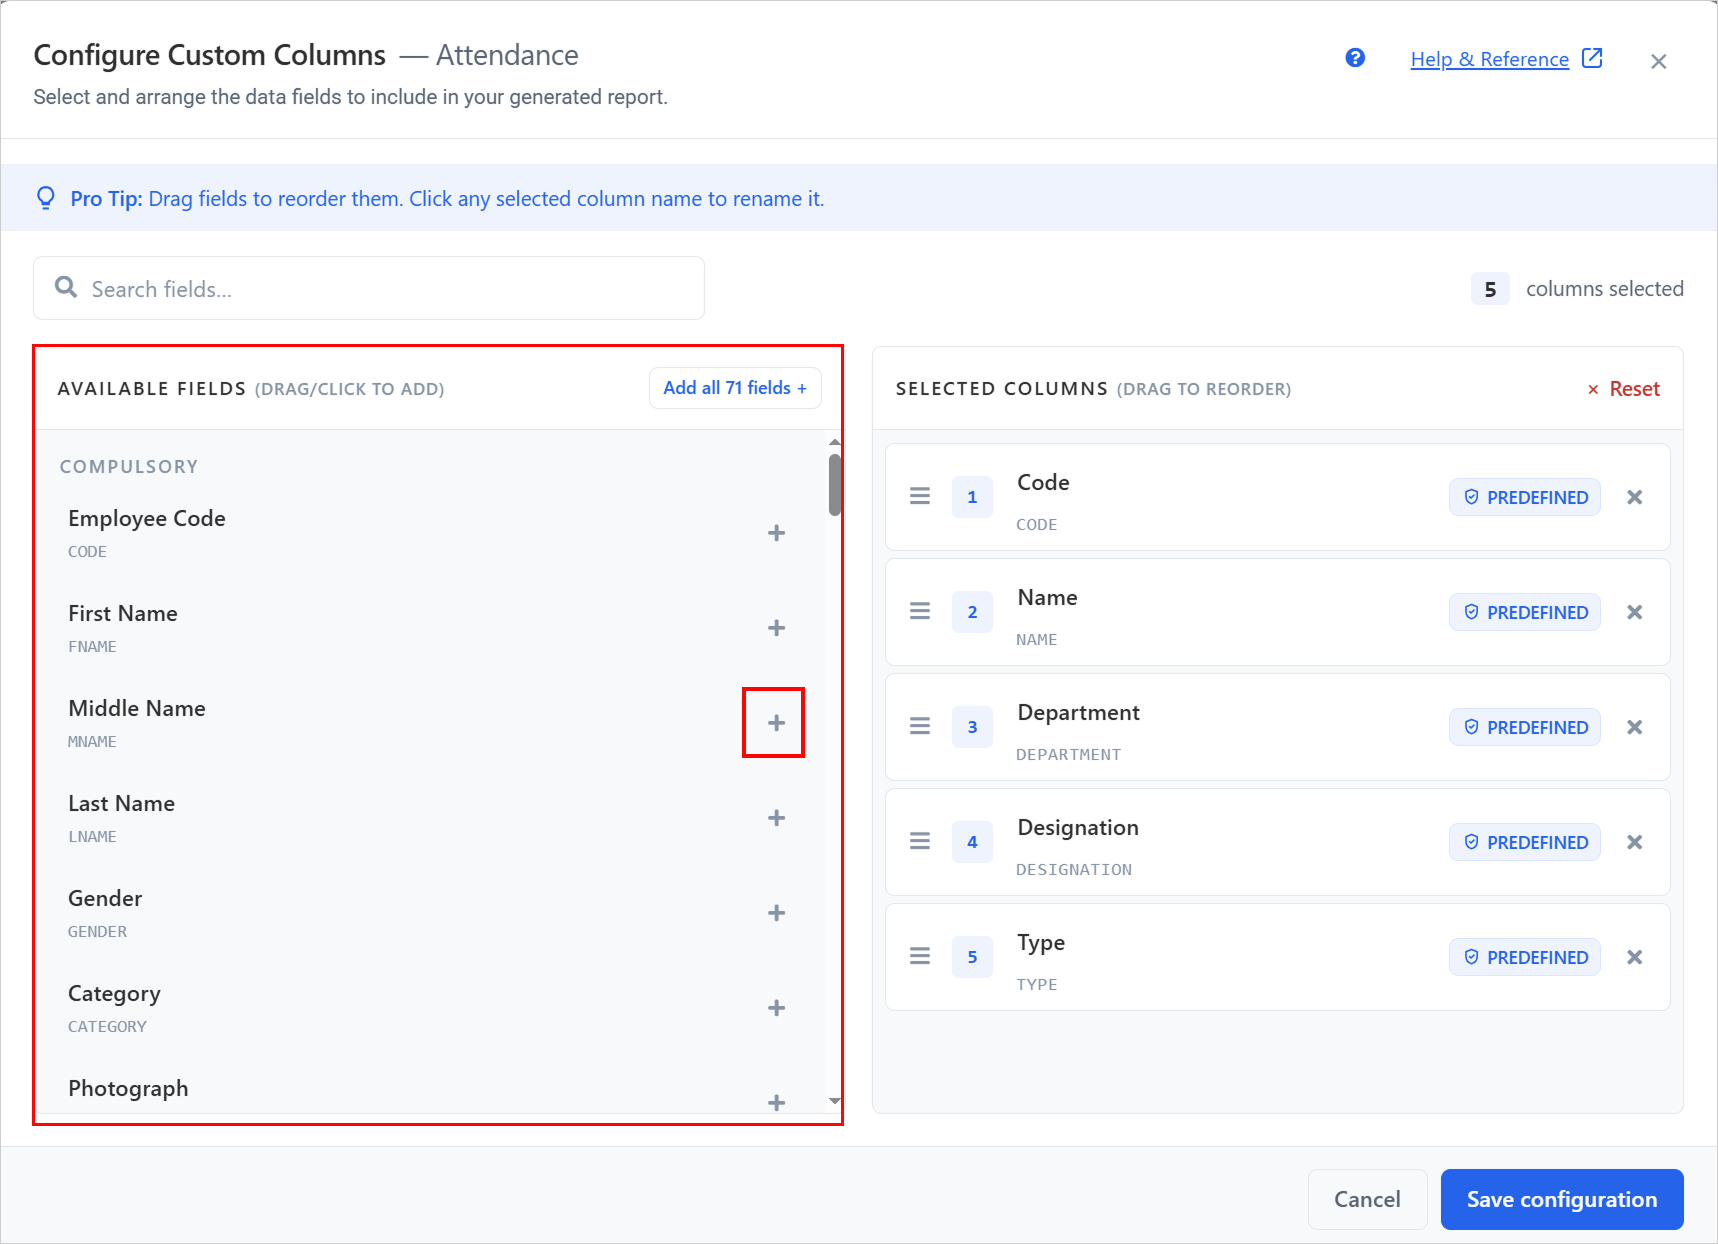
**Step 2:** Click the **settings icon** in the report header to open the **Configure Custom Fields window.**
**Step 3:** Add the **fields** you want from the Available Master Fields panel on the left side. Click the **plus sign** against a field, or **drag** the field towards right panel, to add it to your layout.
**Step 4:** Use the **search box** above the panels to find a particular field, or click **Add all fields** to add every available field in one action.
**Step 5:** Check your layout in the **Selected Right panel**. Each row shows the position number, the Field name and a source tag, and the **count above the panel** shows how many fields you have selected.
**Step 6:** **Drag a row by its handle** to move a field row up or down. The position numbers update as you move it.
**Step 7:** Click a **field name to rename it**, and type the heading you want in its place.
**Step 8:** Click the **cross** at the right edge of a row to **remove** that field. To clear the entire selection and start again, click **Reset (Predefined fields will be reflected)**.
**Step 9:** Click **Save configuration** to apply the layout. To close the window without saving, click **Cancel** instead.
**Available Fields:** Fields are arranged in groups, and each field shows its display name with the technical name below it.
**Help and Reference:** The Help and Reference link at the top of the window opens the full reference guide for this feature on pocket docs.
### **Benefits Of Custom Fields Configuration:**
* **One-time setup** — configure the layout once, and every later download uses it automatically.
* **Consistent across the company** — anyone who downloads that report gets the same fields, order and headings.
* **No second export** — employee details come directly from Profile Config, so no manual matching.
* **Your own headings** — rename any fields to what your team, auditor or bank actually calls it.
* **A cleaner file** — fields you never use can be dropped from the download entirely.
* **Correct formatting** — each field can carry its own Excel format for required fields.
* **Safe to try** — with no saved layout the report behaves as always, and a saved layout can be removed at any time.
**For any queries, contact**